https://codelabs.developers.google.com/codelabs/flutter-codelab-first?hl=ko#0
첫 번째 Flutter 앱 | Google Codelabs
이 Codelab에서는 멋진 이름을 무작위로 생성하는 Flutter 앱을 빌드하는 방법을 알아봅니다.
codelabs.developers.google.com
colab으로 제공되는 스타터팩을 진행해보려고 한다.
맨 처음에 학습할 내용을 훑어주는데, 아래의 내용을 진행한다고 한다.
- Flutter 작동 방식의 기본사항
- Flutter에서 레이아웃 만들기
- 버튼 누르기 등 사용자 상호작용을 앱 동작에 연결
- Flutter 코드 체계적으로 유지
- 앱을 반응형으로 만들기(다양한 화면에 맞게)
- 앱의 일관된 디자인과 분위기 달성
그다음으로는 Flutter 환경 설정을 하는 방법에 대해 설명이 나온다. Visual Studio Code를 기준으로 설명하고 있다. Android Studio로 진행을 할 예정이니 넘어가도록 하자.
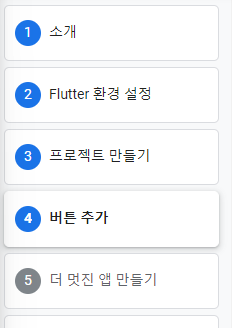
쭉 넘어가서 버튼을 추가해 보자.
 @override
  Widget build(BuildContext context) {
    return Scaffold(
      appBar: AppBar(
        backgroundColor: Theme.of(context).colorScheme.inversePrimary,
        title: Text(widget.title),
      ),
      body: Center(
        child: Column(
          mainAxisAlignment: MainAxisAlignment.center,
          children: <Widget>[
            const Text(
              'You have pushed the button this many times:',
            ),
            Text(
              '$_counter',
              style: Theme.of(context).textTheme.headlineMedium,
            ),

            ElevatedButton(
              onPressed: () {
                print('button pressed!');
              },
              child: Text('Next'),
            ),
          ],
        ),
      ),
      floatingActionButton: FloatingActionButton(
        onPressed: _incrementCounter,
        tooltip: 'Increment',
        child: const Icon(Icons.add),
      ), // This trailing comma makes auto-formatting nicer for build methods.
    );
  }
}
ElevatedButton을 counter Text 아래에다가 만들어주었다. 그리고 ctrl + s로 저장을 해봤더니...
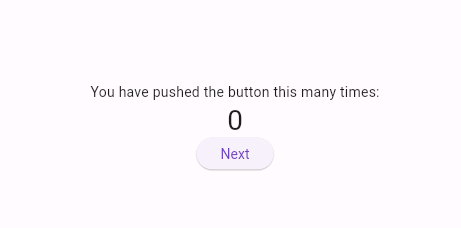
아래에 Next글자를 달고 있는 타원형의 버튼의 생겼다. 버튼을 누르면
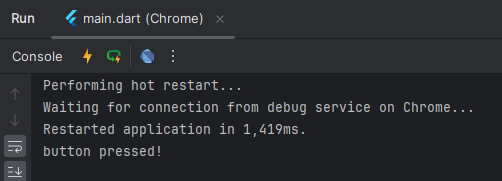
터미널에 button pressed! 가 출력된다. Colab 가이드에서는 Debug Console을 보는 것도 재미있지만, 버튼이 보다 의미 있는 작업을 했으면 한다고 하고, 그 이전에 main.dart의 작동 방식을 알아본다고 한다.
void main() {
  runApp(const MyApp());
}
현재는 main에서 MyApp에 정의된 앱 실행시키기만 한다. 이전 글에서 언급했듯이 MyApp은 StatelessWidget을 상속받는다. 이와 대응되는 StatefulWidget도 있다고 한다.
MyApp의 코드는 전체 앱을 설정한다. 앱 전체 상태를 생성하고, 앱의 이름을 지정하고, 시각적 테마를 정의하고, '홈' 위젯(앱의 시작점)을 설정한다.
MyAppState는 앱의 상태를 정의한다고 한다. 그러나 이전에 생성한 프로젝트에서는 해당 코드를 찾아볼 수 없었다. 우선을 계속해서 읽어보자. 해당 클래스는 ChangeNotifier를 상속받아서 앱의 상태를 관리하는 강력한 방법 중 하나라고 한다.
- MyAppState는 앱이 작동하는 데 필요한 데이터를 정의.
- 상태 클래스는 ChangeNotifier를 상속. 즉, 자체 변경사항에 대해 다른 항목(위젯)에 알릴 수 있다.
- 상태가 만들어지고 ChangeNotifierProvider를 사용해 전체 앱에 제공. 이렇게 할 경우 앱이 위젯의 상태를 알 수 있다.
이 정도 읽으니 MyAppState가 대충 어떤 일을 하는 클래스인지 알 것 같다. 여기까지 보다가 슬쩍 앞으로 돌아가봤더니 yaml 파일에서 dependencies를 추가하여 에셋을 추가해주었어야 했다.
pubspec.yaml파일에 english_words: ^4.0.0과 provider: ^6.0.0을 flutter: 아래쪽에 추가해 주자. 그리고 다시 main으로 돌아와서 get dependencies를 해주고 import를 진행하자.
그리고 버튼의 onPressed에 기능을 추가해 결과 main.dart는 아래의 모습이 되었다.
import 'package:flutter/material.dart';
import 'package:provider/provider.dart';
import 'package:english_words/english_words.dart';

void main() {
  runApp(const MyApp());
}

class MyApp extends StatelessWidget {
  const MyApp({super.key});

  // This widget is the root of your application.
  @override
  Widget build(BuildContext context) {
    return ChangeNotifierProvider(
      create: (context) => MyAppState(),
      child: MaterialApp(
        title: 'Flutter Demo',
        theme: ThemeData(
          colorScheme: ColorScheme.fromSeed(seedColor: Colors.deepPurple),
          useMaterial3: true,
        ),
        home: const MyHomePage(title: 'Flutter Demo Home Page'),
      )
    );
  }
}

class MyAppState extends ChangeNotifier {
  var current = WordPair.random();

  void getNext() {
    current = WordPair.random();
    notifyListeners();
  }
}

class MyHomePage extends StatefulWidget {
  const MyHomePage({super.key, required this.title});

  final String title;

  @override
  State<MyHomePage> createState() => _MyHomePageState();
}

class _MyHomePageState extends State<MyHomePage> {
  int _counter = 0;

  void _incrementCounter() {
    setState(() {
      _counter++;
    });
  }

  @override
  Widget build(BuildContext context) {
    var appState = context.watch<MyAppState>();

    return Scaffold(
      appBar: AppBar(
        backgroundColor: Theme.of(context).colorScheme.inversePrimary,
        title: Text(widget.title),
      ),
      body: Center(
        child: Column(
          mainAxisAlignment: MainAxisAlignment.center,
          children: <Widget>[
            const Text(
              'You have pushed the button this many times:',
            ),
            Text(
              '$_counter',
              style: Theme.of(context).textTheme.headlineMedium,
            ),
            Text(
              appState.current.asLowerCase
            ),
            ElevatedButton(
              onPressed: () {
                appState.getNext();
              },
              child: Text('Next'),
            ),
          ],
        ),
      ),
      floatingActionButton: FloatingActionButton(
        onPressed: _incrementCounter,
        tooltip: 'Increment',
        child: const Icon(Icons.add),
      ), // This trailing comma makes auto-formatting nicer for build methods.
    );
  }
}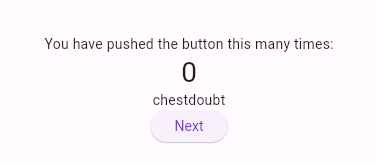
Next를 누를 때마다 단어가 바뀐다! 다음에 시간이 날 때 이어서 진행해 보자.
'개발' 카테고리의 다른 글
| 04-Flutter 첫 번째 Flutter 앱 (2) (1) | 2024.03.22 |
|---|---|
| 02-Flutter 시작하기 (2) | 2024.03.16 |
| 01-Flutter 설치 및 개발 환경 설정 (1) | 2024.03.16 |